
You have your idea and you have your supplies. The next step? Bringing it to life! For every project, there will always be some level of prep or planning before diving in. I think about how I’m going to design the item, how I’m going to assemble it, and whether or not I should make a sample before the real deal. Everyone will develop their own process based on personal preferences, so in this post I’ll be sharing my process, broken down into 3 phases, from inspiration to the first stitch.
Okay! Ready? Let’s get started.
PHASE 1: Inspiration + Research
Inspiration for a project can be as easy as seeing something cool on a walk in your neighbourhood. It’s anything that motivates you to create. Besides the spontaneous bouts of inspiration that can happen throughout the day, I often find inspiration from fabric stores, window shopping, and social media platforms like Instagram and Pinterest. Once I get an idea, chances are the idea is still a little vague. For instance, if I want to sew a jacket, several thoughts come to mind about the type of jacket, the overall style, the colour, the fabric, and so on. So once I feel inspired to sew something, I get to work on doing some research to help me flesh out my idea into something a little more specific.
To figure out the details of this project, I typically use the same resources I use for inspiration to guide me. Keeping with the jacket idea, I would then go on Pinterest or walk around some shops to see what elements I would want to incorporate into this jacket.

Do I want pockets? How long do I want it? Do I want a zipper or button closure? Does it need a hood? All valid questions. So I browse around and see different jacket variations to decide one by one the answers to these questions, eventually ending at a better idea of the jacket I want with the function it needs.
PHASE 2: Design + Plan
With a clearer idea in mind, I now have 2 options on how to construct it: 1) find a pattern (physical or digital), or 2) design it myself.
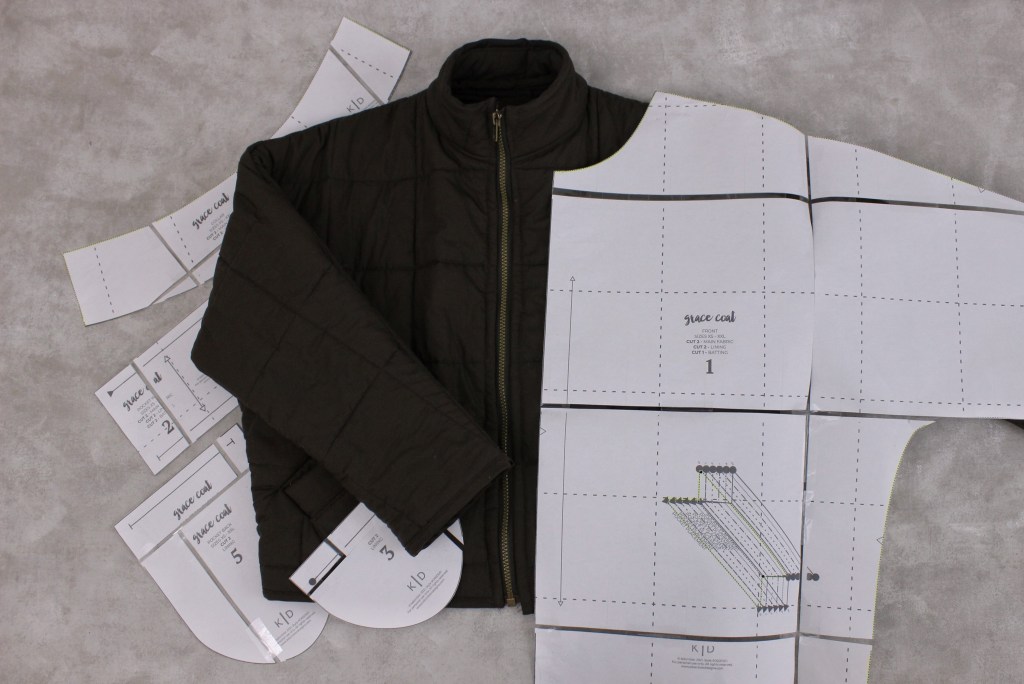
Option 1 is all about ready-made patterns. Just for clarity, patterns are essentially the blueprints of an item. It includes a paper version of the item broken down into its components. These pieces are then traced onto fabric, cut out, and assembled as per the instructions. Voila, a simple and effective way to construct your item! Patterns are available both in-store and online, and can come as a physical package or a digital file. One place I like to browse for digital patterns is Etsy. There’s a huge selection from various sellers and they’re usually very reasonably priced. You’ll just need to print out the pattern, either on several pieces of letter size paper to be assembled later, or on one continuous sheet (more costly) done at a print shop–totally up to you. Another thing to note about patterns is that they have a variety of sizes. Each piece of a pattern will have multiple outlines, each indicating a different guide for a specific size, so cut/trace accordingly!
The other option, Option 2, is designing it yourself. I don’t have a background in pattern making, but there are ways to get around this depending on your skill level and project complexity. For simpler items with a straightforward shape, such as tote bags, packing cubes, or zipper pouches, all you need are measurements. For more complicated pieces like clothing, I’ll make my own pattern from existing items that can act as a template (more on this in a second). What I like most about this option is the full range of customization – you control every aspect of it. So, the first thing I like to do is put my idea down on paper. I personally use Procreate on my iPad, but pen and paper work just fine. I’ll sketch out my idea, and start mapping out the pieces I would need to construct it.

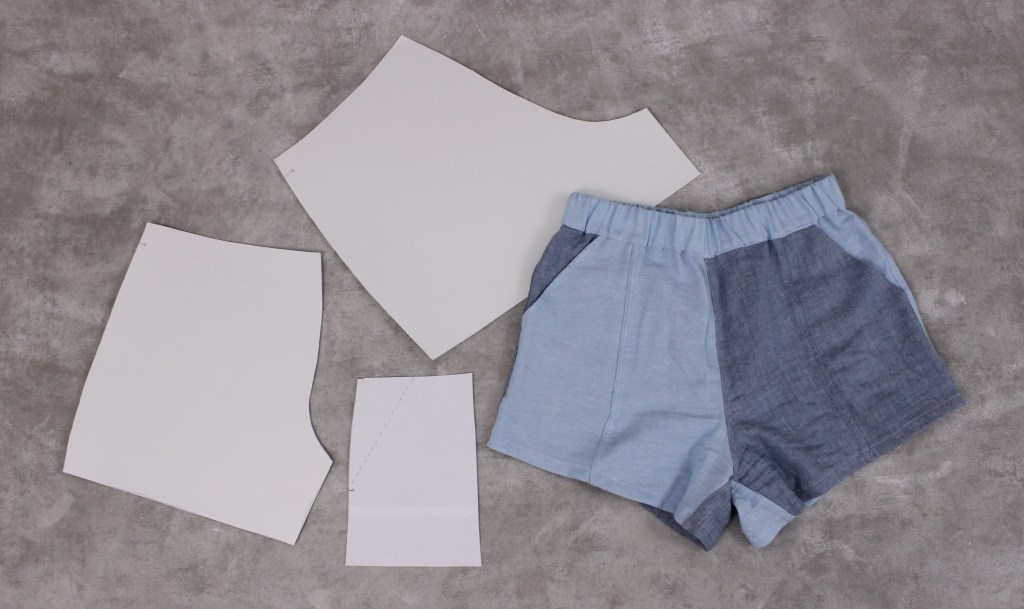
Right: An example of something a little more complicated – I made adjustments to a pattern drafted from a pair of shorts I already owned to make a pair of shorts for the summer.
When determining measurements for simpler items, I usually look around my home for similar items I can use as a reference, adjusting specific measurements to my liking. For example if I wanted to make a tote bag, I’d grab a bag or existing tote and see what dimensions I might want to change, whether it be the strap length, bag depth, number of pockets, you name it.
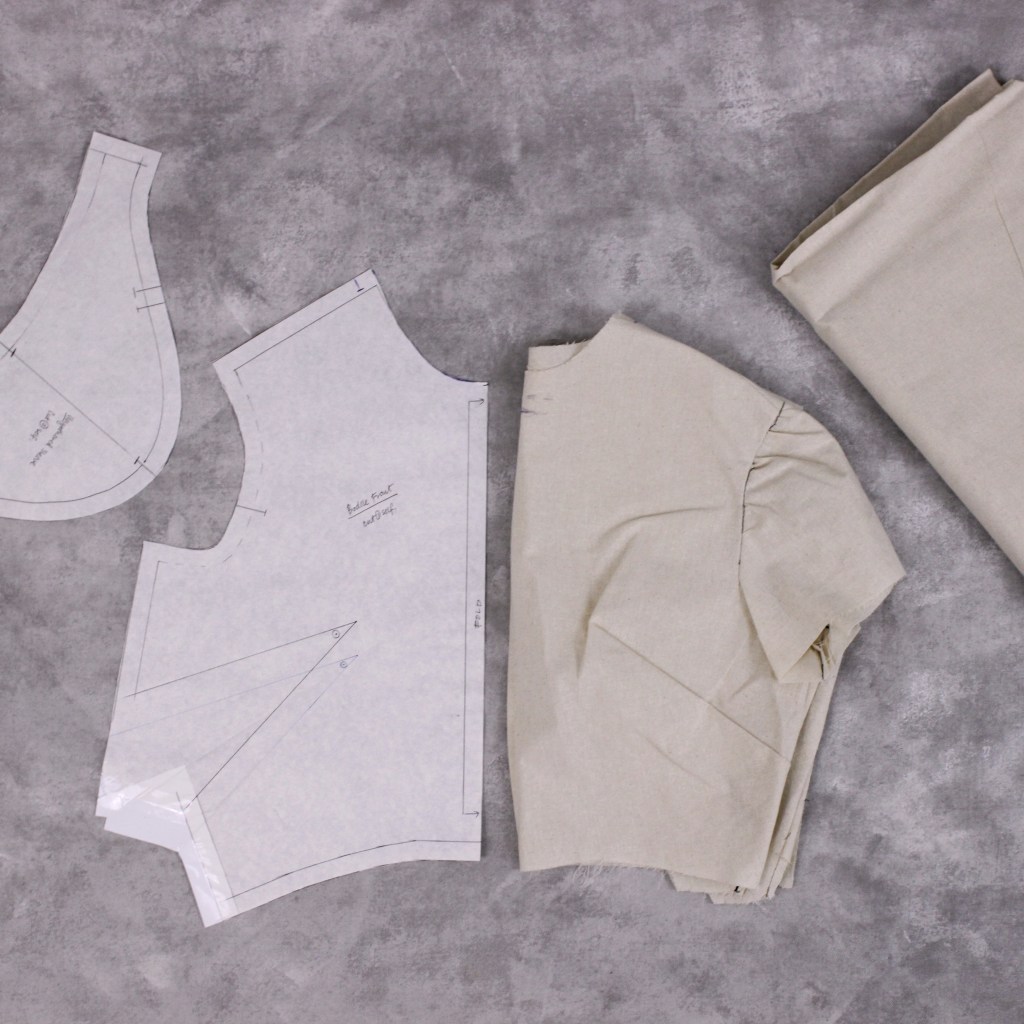
For more complex items such as clothing for which you might consider making your own pattern, a number of resources exist showing you how to do this (here’s an oldie but a goodie video that I’ve come back to a few times). Essentially, you go backwards from a finished item to the individual pieces traced onto paper. Ideally you would do this for comfortably fitted pieces of clothing to set as your base, and once you have these, you can customize the shape, length, and style to match your vision. A step up from this would be to make your own block, a more tried and true form of your base pattern drafted from your body measurements. Doing this is a bit more extensive and requires more research and supplies, but could be a worthwhile endeavour if custom clothing is big on your sewing list! From here, it’s just finding some fabric and heading to Phase 3.
PHASE 3: Sample + Test
The last step of my process involves some testing on the sewing machine and making a sample of the pattern if I choose to do so.
When I say testing, I’m referring to testing the best settings for your chosen fabric on a scrap piece, including the needle type, stitch length, tension, thread colour, etc. I typically write down these details for future reference, so if I ever use the same or similar fabric, I have something to work off of. Needle type is particularly important for certain fabrics! Different needle types exist for different weights or stretch of fabric, whether it be a knit, chiffon, canvas, or denim as a few examples. The goal is to avoid breaking needles and skipping stitches, so be sure to have the appropriate needle type for your fabric plus a few spares just to be safe.
A sample on the other hand, involves constructing a prototype out of some other fabric. Muslin, made of cotton and easy to work with, is a popular choice for this, however any scrap fabric of similar weight and stretch to your actual fabric will work just as well. Although making a sample may sound tedious, I have never regretted making one. When it comes to patterns I’ve bought or a pattern I’ve drafted, making a sample is great for testing the size and fit, and gives an extra opportunity to make any additional adjustments that could improve the outcome of the final piece. If adjustments are made, just remember to transfer these changes onto your pattern and you’ll be good to go!

A final consideration before finally cutting your fabric. At this point, it is also a good time to consider how you might want to finish the seams/raw edges on your project once you get into it. There are several ways to do this, including bias tape, an overlock stitch (not included with all sewing machines), or a French seam to name a few, but considering this before you start is helpful incase you need to pick up any additional supplies or leave extra seam allowance when you cut your fabric. If you’re interested, here’s a video going over some of the ways you can finish your seams that I’ve referenced in the past.
Alright, we’re ready! Methodical and a little lengthy I know, but this is a measure twice cut once type of situation. The pre-planning just helps establish a better workflow and guarantees better success in the long run. Of course, adjust accordingly to what works best for you, this is just a peek into my brain of some of the things I consider before diving in.
I hope you’re enjoying the ride so far and I hope you’ve found this series useful. Now that you have a better understanding of my setup, we can finally get into some sewing projects, woohoo! Stay tuned for what’s to come 🙂
